My new toys!! :) Gotta love boxing week hehe
I'm a crafty girl who loves to do all kinds of crafts during my spare time. I'm always looking for new challenges and I love to share all my fun interactive creations with others. I make easy to follow picture tutorial to teach others to create their own.
Total Pageviews
Sunday, December 30, 2012
Saturday, December 29, 2012
Stamping ideas (video)
Wow.. How pretty is that!! I really need to get myself some new toys haha.
Really neat techniques she uses and I like the idea of only using the one stamp.
CHECK IT OUT for some new ideas :-)
Tim Holtz Ink & Video
I LOVE Tim Holtz distress ink! They really amp up all my projects.
Can't wait to get more !! :-)
Here is a little video I found on youtube of Tim Holtz talking about
his new line of markers and distress ink!
CHECK IT OUT!
Friday, December 28, 2012
Sneek Peek Paper Bag Mini
Here is a sneek peek at my Paper Bag Mini.
There is still alot of work left to do. I finally get to use my new crocodile to bind the album together. I also have to work on the tabs, add journaling lines, add ribbon to the tags and bedazzle the album. I also need to find hard cardboard for the cover of the album. Yet to own any.
I will try and make a video of the finish product and take pictures of the album with tags and withought them. All this to come this weekend!
Ps. I made this super cute album in an hour. I couldn't stop I was having too much fun!! If you use a good line of paper that has images and more simple backgrounds, all the pages will coodinate together and it makes it alot easier to mix and match the backgrounds :)
Tuesday, December 25, 2012
Monday, December 24, 2012
Waterfall Card
My Waterfall Card
I made this really quickly (prob took me 10 minutes) so its definitely not my best work. I was just playing around with it to see how it works. This was suprisingly pretty easy and quick to make!
There are 3 ways I suggest using the waterfall card:
1: On its OWN, just add a nice cardstock to the back of the card and Voila!
2: Glue it to the FRONT of a larger card and inside the card write a nice personal message.
3: Glue it to the INSIDE of a larger card and add a nice fun picture to the FRONT of your card.
Example for a birthday card:
Front of card: Glue big two dimention ballons with sparkles
Inside of Card: Glue the waterfall card on the right side and on the left write a nice personal message to the person about their birthday.
Waterfall card: For the 4 squares to fill, you could write for example:
1- Happy 2- 30th 3- Birthday 4- Jim! OR
You could use 4 different stamps with birthday images on them.
REALLY GUYS THIS IS SO EASY AND FUN TO PLAY WITH. Try it out yourselves and you'll see what I mean. Once you get the hang of making your first one, you'll love making them!
Never Ending Card
My Infinity - Never Ending Card I made for one of my really good friends back home.
Im glad everyone enjoyed receiving them in the mail!
I had alot of fun making them too :)


Sunday, December 23, 2012
Infinity Card 1
This is my version of a Infinity Card I made for a childhood friend.
I took each picture as i opened up the card.


Saturday, December 22, 2012
Shopping trip at Michael's!
I went to Michaels Today and walked out with this!! Yahoo!!!
Pretty excited about my new pad of cardstock paper.

Whoohoo! Check out my New Paper Bags!!! Going to try something new with different sizes of bags. The smaller brown bags on the right... this should be interresting!! Going to try and use them as Pockets in my Paper Bag Album...
I bought MUCH more stuff today but can't post it till after Christmas. Bought my hubby some REALLY neat stuff. (He is a pretty great artist himself).
Friday, December 21, 2012
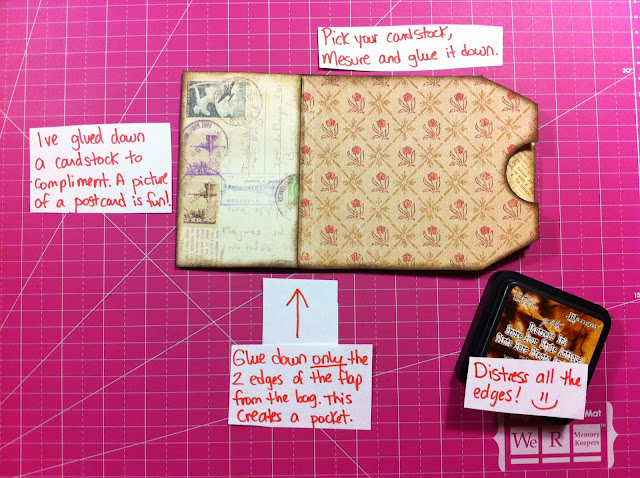
Christmas Gift Card Tutorial: Part 2
Gift Card & Pocket: PART 2
Step by Step
Please keep in mind that double sided cardstock would be preferable for this type of project. Unfortunately for me, I'm keeping my good double sided Christmas paper for my Scrapbook Album. Using double sided cardstock would make your card & pocket more rigid.

Christmas Gift Card
I was in Walmart looking at Christmas Cards and realised how PRICY they were and decided to make my own.
I recommend to take a picture of cards you like for inspiration and then try and re-create one of your own. Makes the card alot more personal and saves you money!!
Here are pictures of the two cards that inspired me.
Tuesday, December 18, 2012
Squash Card
Here is my version of a
SQUASH CARD
I made this months and months ago. Found the pictures on my laptop today.
If requested, I will make a new one with a Step by Step.
Some of the tools I used...
Paper I used...

Base cardstock I used...

My Wish List @ Michael's
Monday, December 17, 2012
Paper Bag Album: Pocket 4
Paper Bag Album: Pocket 4
Step by Step
I will add some stamping, some tags, layers and so on. This is only step 1 to a beautiful Paper Bag Album! Stay tuned for more ways to create your album.
Enjoy
Sunday, December 16, 2012
Paper Bag Album: Pocket 2
Paper Bag Album: Pocket #2
Step by Step
The above paper line is the paper I used. I absolutely love double sided paper for this project.
Paper Bag Album: Pocket 1
My Paper Bag Album: Pocket #1
Step by Step
There are SO many ways to do a paper bag album, here is just a few examples I've come up with.
Don't forget, be creative, have fun with it and think outside the box!
Here we go!
You can find these paper bags at any Michaels stores.
They have ALL sorts of colours.

Smash Book
My Smash Book
I have all my ideas on every page, just havent gotten around to "smashing" haha.
When I do, I'll post some ideas :) Stay tuned!
Friday, December 14, 2012
Wednesday, December 12, 2012
Flower Table Center Pieces
Flower Table Center Pieces
I went to a Community Connection Lunch today and these were the center pieces the clients had made and gave them out as door prizes at the end of the lunch. They had made over 100 of them.
These are real easy to make and look real nice too. These were made by our clients of all ages so believe me when I say ANYONE can make these!
ALL YOU NEED is: Paper, Battery Powered Flickering Candle & Glitter (optional).
Monday, December 10, 2012
Slider Card Tutorial
Here is my step by step 'How To' in pictures.
I find it alot easier to understand in pictures.
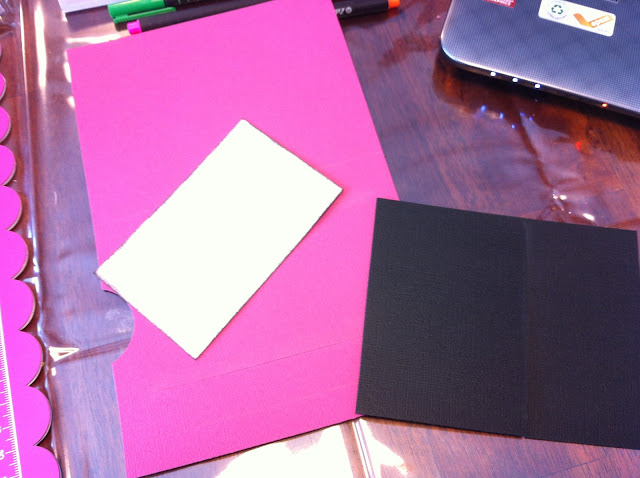
You need 3 different colours of paper. (I will get u the mesurments soon, i forget them right now)
The black cardstock is the slider
The white cardstock is the background to your images
The red cardstock is your card
The red cardstock will have two horizontal cuts in order for the slider to 'slide'.
Depending on the size you'd like your slider, you will cut your white cardstock, a trick is to trace the top and bottom line of your white cardstock (make sure to center the white cardstock) onto the red cardstock those will be your guidelines for the slider. I used my cutter to cut them in a straight line. You can always use a ruler and a exacto knife.
I also used my circle puncher to punch out a half circle to allow a space to pull out the slider.
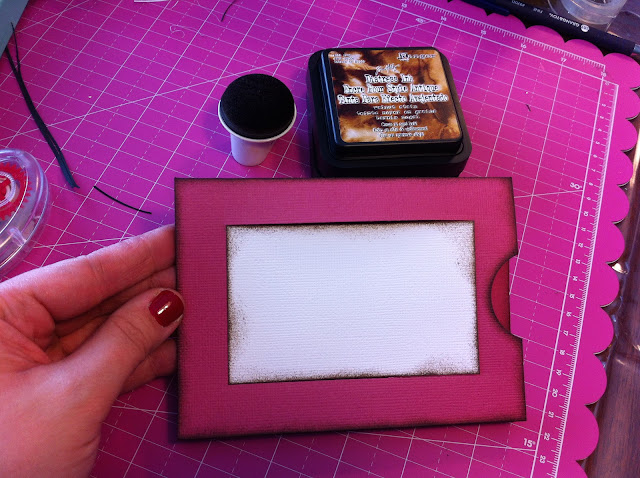
Using my sponge, I then distressed the edges of the papers with my Tim Holtz distress ink.
(LOVE this part! Distressing your projects always adds a little special touch)
Then I glued the white cardstock down and made sure it fit perfectly between the two horizontal cut lines.
Subscribe to:
Posts (Atom)


